DIY Aeolian Harp Designs by Kevin Busse
My fascination for Aeolian Harps began in the late summer of 2014, and by 2015 I had developed a few prototypes that I can share with you today in this blog post.
I had great results with my prototypes between 2015-2016 but am always looking for ways to improve the sound volume, tone quality, and ease of use.
If you have any questions or suggestions, please reach out to me via my contact form on my website.
DIY Aeolian Harps by Kevin Busse circa 2015
Have a look at as much as you'd like.
All of the harps I'll show you in this post use .62mm gauge piano wire. I tested all of my prototypes at the beach. The windspeed was about 15-20mph that day.
The end goal for me is to make the LOUDEST harp that I possibly can make. I think amplitude (loudness) is an important quality to keep in mind when designing these instruments.
DIY Aeolian Harp (4 Feet Long)
This first harp is by far my favorite of my wooden Aeolian Harps mostly because this design functions the best.
At the time I built this instrument I didn't believe that the bridge design was optimal, but it remains one of the best sounding wooden Aeolian Harps I built from scratch.

View the 4 foot Aeolian Harp (along with an 8 foot long harp) out on the beach here ==> Aeolian Harp Video
DIY Aeolian Harp (2 Feet Long)
This next successful harp below is 27 inches long, however, it was very faint. This design is the only exception where I used 1.1 mm gauge piano wire.
Notice how I changed the design of the bridge in order for the string to stay rock solid at the termination points.
Though these termination points look interesting, there's no evidence that these termination points had any significant improvement to the resonance.

Here's another angle of my 27 inch wooden Aeolian Harp.

Aeolian Harp "Downbearing" modification
In these next couple of harps, I experimented with what is called "downbearing," which is a common vocabulary term in the world of Piano Technology. Notice that these are identical harps, but the bridge height is different.
As a beginner piano technician 10 years ago, I spoke with piano rebuilders and they had taught me that this is a significant part of making the string resonate well. Unfortunately, at the time when I built these harps, I didn't have enough data to prove that this was a significant component to their resonance.
Additionally, these harps didn't resonate on the beach with 15-20mph wind. Again, both of these harps are on the shorter side measuring in at 18 inches long.

I believe that having sufficient downbearing is important to transduce the vibrations of the string into the wood (pinblock) for maximum resonance.

In this photo above you can see that I experimented with a unique termination point to determine if this played a significant factor in the sound.
My determination is that while termination points are important to the overall resonance of the instrument, the result of this specific termination point design was insignificant.
DIY Aeolian Harp (12 inches long)
This next harp pictured below is 12 inches in length and has only worked outside a car window in my hand.
Again, notice the bridge. I'd like to think that this bridge design with the three pins is promising, yet again there is not substantive evidence to support that it makes a significant improvement to the resonance.

Here's another angle of the 12 inch Aeolian Harp that I had inscripted with the phrase "Find The Wind." Lastly, I had the outside refinished for a complete look.

DIY Aeolian Harp (6 inches long)
This last wooden Aeolian Harp is 6 inches long. This harp only works when holding it outside a passenger window of a car.

More DIY Aeolian Harp Designs
Bear in mind, these were honest attempts at trying to make the best harp that I could. I had intentionally spent most of my efforts focused on making the single string vibrate as best as it could.
The harp in the picture below has a piano string tied from the very top of those pipes I had assembled to the very top of the bucket handle. In fact, the bucket is levitating off of the ground because it is held up by the piano wire.
The theory here is that the piano wire would vibrate best if it is absolutely verticle. Additionally, being stretched to its tensile strength by filling the bucket just before its breaking point allows for a large (loudest) amplitude.
Unfortunately, this harp failed perhaps because the termination points were not defined.

The benefit of this design is that I realized that a wire oscillates best when it's in a vertical position due to gravity. This was a significant breakthrough for me.

Keep in mind, I was a musician at the time, I'm not an architect!

DIY Aeolian Harp (Fishing Pole Design)
Here's a couple cheesy photos of my latest (in 2016) successful harp (single string).
But first, let's cover some of the logistics:
15 foot long fishing pole
40lb strength fishing pole
8lb test fishing wire
The wire was brought to its tensile strength
The idea behind the fishing pole was to make the harp more user friendly. For example, I could give the pole to a friend to tighten (with the drag set in the correct position) and my friend would aimlessly reel it to its correct tension.
I know that this latest (circa 2016) prototype works, yet I am still in search for a way to make it louder.

It's a hilariously magnificent photo of me in my youth holding up my latest invention!

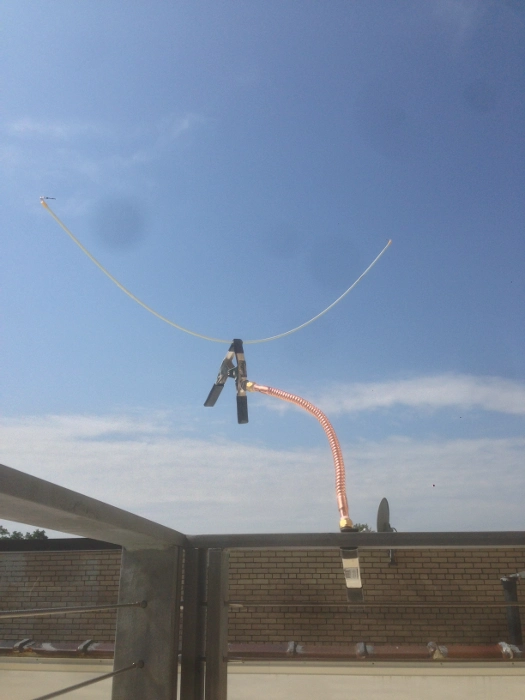
DIY Aeolian Harp (Fiberglass rod)
This recent design (circa 2016) one was created with fiberglass rods with a fishing wire attached. This string is pulled to its tensile strength and works quite well.

Thanks for reading!
Feeling inspired? Read more theory on Wikipedia with Strouhal for a scientific understanding of string oscillation and fluid dynamics.